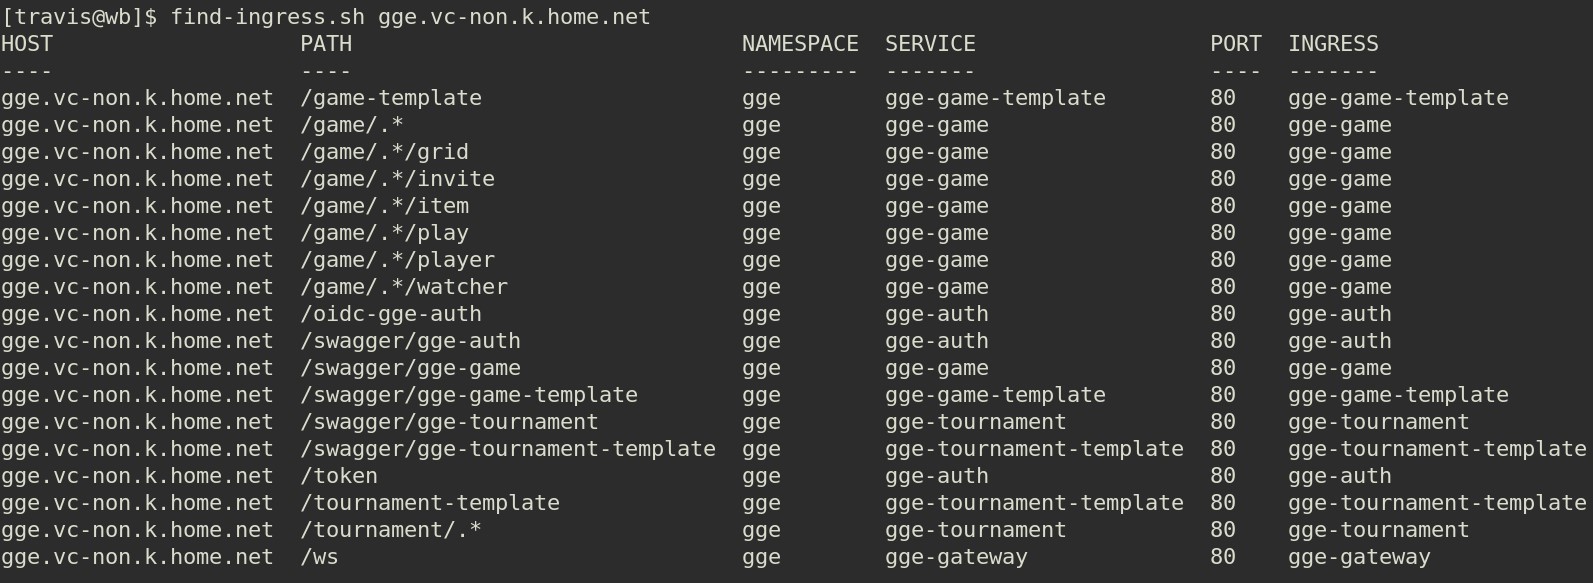
Was thinking about writing a lunch voting app for work

Something similar to https://lunch.pink but specific for work, so running in a container with OIDC setup for coworkers.  Coworker then could create a lunch event public or private, invite folks, folks could respond with interest and vote for their favorite restaurants, or just keep their same favorite restaurants from last time.

As a webapi could create integrations into Teams or a mobile app.

Could be a good excuse to write a controller and some custom resource definitions.  Some initial ideas captured:

---
New-Restaurant

  Add new restaurant to favorites list
 
Get-Restaurant

  Get listing of preferred restaurants

Set-Restaurant

  Enable/disable restaurant as favorite to include with voting
 
Remove-Restaurant

  Remove restaurant from favorites list

---
New-Event

  Create new event
  -Description ""
  -IsViewable <true>
  -IsInviteOnly <false>
  -Timeout <when_voting_ends, default 5 minutes>

Get-Event

  Show all events if admin, otherwise only show public events, or events you've been invited to

Set-Event

  Adjust attributes 'IsViewable', 'IsInviteOnly', and reopen voting.

Remove-Event

  Remove event

---
New-Invite

  Create new invitation to event
  - only owner can create invitation
  - invite id is a guid

  -Username <username> // <optional> send through teams, or email, etc...
  -EventId

Get-Invite

  View current/expired invitations

Set-Invite

  Accept / Reject an invitation

Remove-Invite

  Withdrawl an invite

(storage) ceph is amazing

If you haven’t tried out ceph yet, and are not yet completely satisfied with your onprem storage system, I recommend giving it a try.  (Note, it does want a lot of cpu, so heads up on that.)

** I acknowledge that I am currently excited and completely captivated by ceph.  I’m still fairly new to using ceph, so you might want to check my facts, a.k.a. I’m tempting you to start investigating. 😉

Ceph is able to use multiple disks on multiple servers and spread out the load, maintaining two or three copies of data to avoid data loss.  Just look at my humble 4 disk system with the data spread out nearly perfectly across the disks.  (2 nodes with 2 disks each)

Ceph provides cephfs (ceph filesystem), cephrbd (ceph block storage).

Block storage gives you something like a disk, it’s useful for say creating a vm that you later want to hot-swap between servers.

Otherwise, the ceph file system is what you want to use, though not directly.

You’ll end up creating a pool which is based on the ceph filesystem (cephfs), then create pvcs that come from the pool. Also you can use iscsi (which uses cephrbd) or nfs, (which uses cephfs), if you have a consumer that is not able to connect with cephfs or cephrbd directly.

In my experiences working with storage systems and kubernetes persistent volumes, I was not having luck with RWX (read write many), even when the providers claimed they worked (nfs using my own linux server, longhorn which uses nfs for rwx). I found two apps ‘plex’ and ‘nextcloud’ would consistently experience database corruption after only a few minutes.

People continually told me “NFS supports RWX” and “Just use iSCSI, that’s perfect for apps that use SQLite”. I tested these claims and did not get the same result using a TrueNAS Core server.

However, with ceph you can allocate a pvc using cephfs, and this works perfectly with RWX! Awesome! And super fast! All my jenkins builds which run in kubernetes sped up by 15 seconds vs TrueNAS iSCSI, of course … this could just mean the physical disks running with ceph are faster than the physical disks running with my truenas server, can’t be sure.

Now I suspect if I created pvcs using NFS and iSCSI, which work on top of cephfs, that they might also support RWX. I’ve very curious, but given how fast cephfs and that everything is working perfectly, I can’t see any reason to use NFS or iSCSI (except for vm disks).

Using the helm install of ceph you end up with a tools pod that you can exec into and run the ‘ceph’ cli. The dashboard gui is pretty great, but the real interaction with ceph happens at the command line level. I’ve been in there breaking & fixing things and the experience feels like a fully fledged product ready for production. There is so much there I can see someone managing ceph as a career with an available deep dive as far as you are interested in going. If you break it enough and then fix it you get to watch it moving data around recovering things which is as cool as can be to watch, from the most geeky perspective.

In any case, given how long cephfs has been around and the popularity it has in use in production environments, I think I’ve found my storage solution for the foreseeable future.

Ceph – Getting Started

thinking out loud: micro service – basic

Micro-service - basic

  Singleton service
    - establish outgoing socket(s)
      - re-establish if dropped
    - listens on port 80
      - re-establish if dropped
    - process network data
      - multiple outgoing websockets
      - multiple incoming websockets
      - rest api methods

  Environment variables
    - api key for outgoing socket(s)
      - if no api key, try anonymous
    - outgoing target host(s)
    - database connection values
    - incoming, allow anonymous?

  Incoming websocket
    /ws
    ... api key (optional / required)

  REST Api
    ... api key (optional / required)
    /auth - oidc logic, get api key
      - api key stored to provided db
      - default api key timeout
      - can specify expiration
    swagger - auto generate

  Cleanup
  - dropped sockets managed
  - dropped db sockets managed
  - disable watching appsettings.json

(centos) k8s-update.sh – script to upgrade a kubernetes cluster

Script to update a kubernetes cluster to the next patch or minor version.

#!/bin/bash

# if no parameter, show versions and syntax
if [ -z $1 ]; then
  # show available versions
  yum list --showduplicates kubeadm --disableexcludes=kubernetes

  # show syntax
  echo ""
  echo "Syntax:"
  echo "$0 <version>, e.g. $0 1.26.x-0"
  exit 1
fi

# remember version
export TARGET_VERSION=$1


# configure kubectl to use admin config
export KUBECONFIG=/etc/kubernetes/admin.conf

# track first control plane node
export IS_FIRST=1

# loop through control plane nodes
#kubectl get nodes --no-headers | xargs -n 5 echo
NODES=`kubectl get nodes --no-headers | awk '{print $1}'`
for NODE in $NODES; do
  # parse kubectl node output into parameters
  NODE_HOSTNAME=`kubectl get node $NODE --no-headers | xargs -n 5 bash -c 'echo $0'`
  NODE_TYPE=`kubectl get node $NODE --no-headers | xargs -n 5 bash -c 'echo $2'`
  NODE_VERSION=`kubectl get node $NODE --no-headers | xargs -n 5 bash -c 'echo $4'`

  # only work on control plane nodes in this loop
  if [ $NODE_TYPE != "control-plane" ]; then
     #echo ""
     #echo "skipping worker node"
     continue
  fi

  echo ""
  echo "***"
  echo "* Next: $NODE_HOSTNAME"

  # upgrade kubeadm
  echo "upgrade to: $TARGET_VERSION"
  ssh root@$NODE_HOSTNAME yum install -y kubeadm-$TARGET_VERSION --disableexcludes=kubernetes

  # verify the download works and has the expected version
  #ssh root@$NODE_HOSTNAME kubeadm version

  # verify the upgrade plan
  #ssh root@$NODE_HOSTNAME kubeadm upgrade plan

  # perform the update
  if [ $IS_FIRST == "0" ]; then
    ssh root@$NODE_HOSTNAME kubeadm upgrade node
  else
    # if this is the first control plane node its command is a little different
    ssh root@$NODE_HOSTNAME kubeadm upgrade apply --yes v$TARGET_VERSION

    # adjust tracking now that we've completed the first control plane node
    export IS_FIRST=0
  fi

  # drain node & prepare for updating
  kubectl drain $NODE_HOSTNAME --delete-emptydir-data --ignore-daemonsets

  # update kubelet & kubectl
  ssh root@$NODE_HOSTNAME yum install -y kubelet-$TARGET_VERSION kubectl-$TARGET_VERSION --disableexcludes=kubernetes

  # restart kubelet
  ssh root@$NODE_HOSTNAME systemctl daemon-reload
  ssh root@$NODE_HOSTNAME systemctl restart kubelet

  # uncordon the node
  kubectl uncordon $NODE_HOSTNAME
  
done


# loop through worker nodes
NODES=`kubectl get nodes --no-headers | awk '{print $1}'`
for NODE in $NODES; do
  # parse kubectl node output into parameters
  NODE_HOSTNAME=`kubectl get node $NODE --no-headers | xargs -n 5 bash -c 'echo $0'`
  NODE_TYPE=`kubectl get node $NODE --no-headers | xargs -n 5 bash -c 'echo $2'`
  NODE_VERSION=`kubectl get node $NODE --no-headers | xargs -n 5 bash -c 'echo $4'`

  # only work on control plane nodes in this loop
  if [ $NODE_TYPE == "control-plane" ]; then
     #echo ""
     #echo "skipping control plane node"
     continue
  fi

  echo ""
  echo "***"
  echo "* Next: $NODE_HOSTNAME"

  # upgrade kubeadm
  echo "upgrade to: $TARGET_VERSION"
  ssh root@$NODE_HOSTNAME yum install -y kubeadm-$TARGET_VERSION --disableexcludes=kubernetes

  # verify the download works and has the expected version
  #ssh root@$NODE_HOSTNAME kubeadm version

  # verify the upgrade plan
  #ssh root@$NODE_HOSTNAME kubeadm upgrade plan

  # perform the update
  if [ $IS_FIRST == "0" ]; then
    ssh root@$NODE_HOSTNAME kubeadm upgrade node
  fi

  # drain node & prepare for updating
  kubectl drain $NODE_HOSTNAME --delete-emptydir-data --ignore-daemonsets

  # update kubelet & kubectl
  ssh root@$NODE_HOSTNAME yum install -y kubelet-$TARGET_VERSION kubectl-$TARGET_VERSION --disableexcludes=kubernetes

  # restart kubelet
  ssh root@$NODE_HOSTNAME systemctl daemon-reload
  ssh root@$NODE_HOSTNAME systemctl restart kubelet

  # uncordon the node
  kubectl uncordon $NODE_HOSTNAME
  
done